Resources
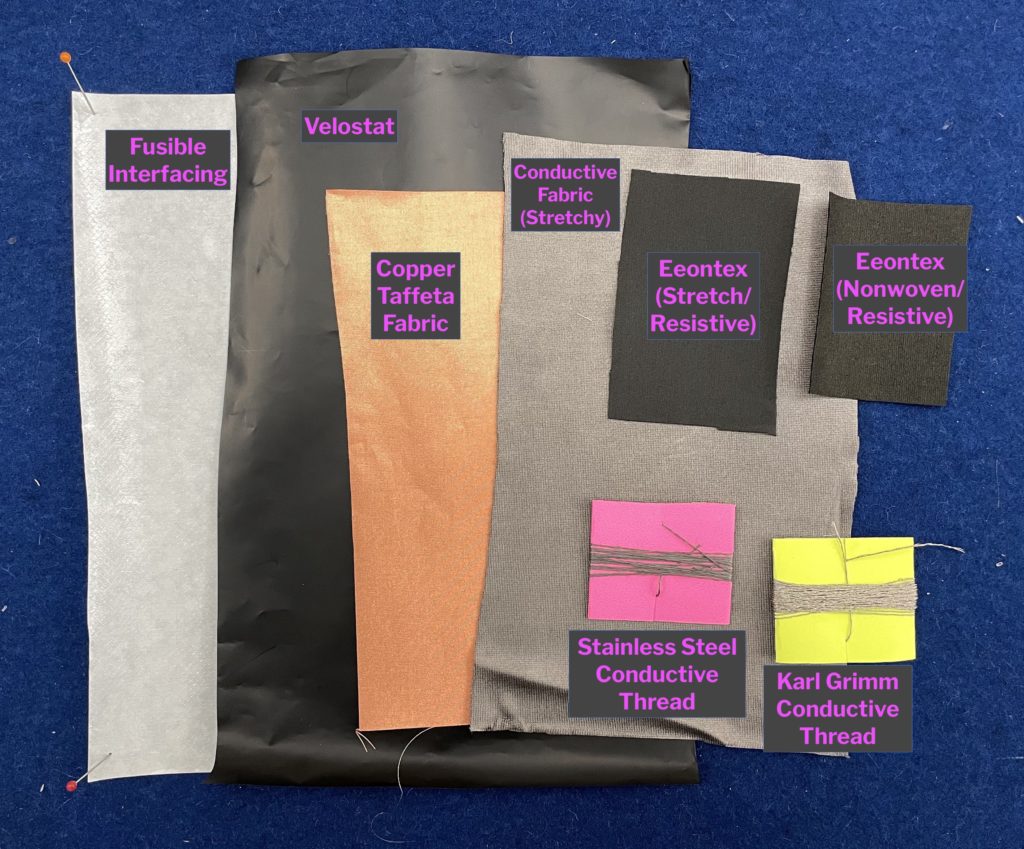
- Your conductive materials kit. For more, see the Materials page and the conductive materials category from Kobakant

- Lectures from Victoria:
- Types Of Fabrics | Everything You Need To Know | Sewing 101
- Techniques
- Embroidery – tutorial list of basic embroidery stitches
- Machine sewing – how a sewing machine works and how to sew using a sewing machine
- The New Bend exhibit curated by Legacy Russell
- Unsettling Coloniality: A Critical and Radical Fiber/Textile Bibliography
Assignment
Due Date: Wednesday, Mar 2
Note: Please scope your sensor appropriately. This entire assignment should take you roughly 2.5-3 hours max. This looks long, but it is only because I have tried to provide copious notes and guidance on some of the areas where folks encountered issues last class. I will also try to make a few videos early in the week that guide you through the programming process if I have time.
Step 1: Make a sensor (30-45 mins)
Design or replicate a sensor (variable resistor) that uses resistive material (velostat or eeontex) and conductive material (copper fabric, stretch conductive fabric, Karl Grimm thread, and/or stainless steel thread).
- Spend a few minutes testing (e.g. with a multimeter) and/or researching the materials you want to use. See the Materials page and the conductive materials category from Kobakant
- Draft a sketch or diagram of your sensor.
- If you need help getting started, please see these sensors we reviewed in Week 4. You can see the sensor category from Kobakant.
- I encourage you to use this opportunity to research how these craft techniques manifest in different cultures and subcultures for inspiration. If you pull any techniques, symbolism, etc from a particular place, please make sure to attribute.
- Build it. Pay attention to your craft detail for electrical and aesthetic purposes.
Step 2: Test and program your sensor (5 mins)
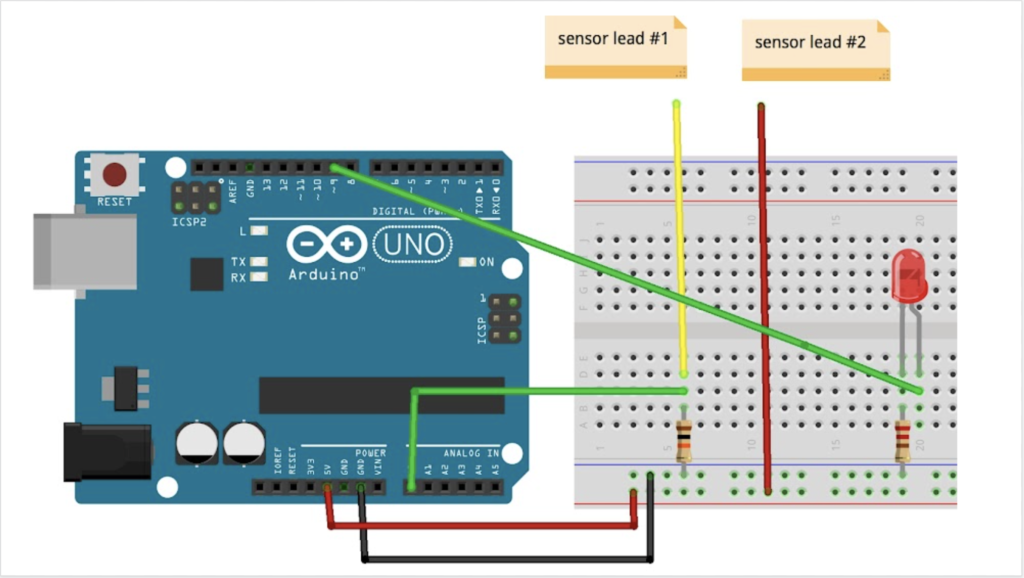
- Build this variable resistor circuit. It is same one from week 4:

Step 3: Program your sensor (10-20 mins)
- Adapt this Arduino sketch (ReadingSensorValues_map_constr_smooth.ino) to control the LED with your sensor. Our goal is to have it turn all the way off at rest and all the way on when it is pushed, stretched, bent, etc the most.
- Run the code.
- Open the serial monitor
- Look at the average value. Determine the value at rest and the value when activated.
- Use to adjust the map() function by changing the second parameter in the map() to your lowest value and the third parameter to your highest.
- Add these same values to the constrain() function. lowest and highest values to the constrain() function.
- Note: If your LED is not turning all the way off, try the same steps with this example using a conditional (ReadingSensorValues_map_constr_smooth_conditional.ino)
Step 4: Replicate your sensor (60-75 mins)
- Create 1 more of them using the same production process for a total of 2 sensor swatches. The look can vary.
- Bring ALL of them to class for an exchange.
Step 5: Document your sensor (10-15 mins)
- Fill out one page of this template for your sensor: Computational Craft Sensor Swatchbook
- Document your sketch per course guidelines, then upload it to the #week-5-assignment Slack channel. Please note any challenges you faced in your post.